Friday, August 10, 2012

Ravellenics

Yup. I missed Wednesday's post, mainly because I had no major WIPs to report. 

But yesterday, I had the opportune time to start and finish an item-- waiting for the UPS truck to arrive with my portable air conditioning unit! 

Want to see what I accomplished?

It's an Ice Cream Cutie! My very first self-designed amigurumi project!  He has all the sweetness of regular ice cream, with no sugar added! 

 My original design looked absolutely nothing like this, except for the colours and wavy arms. 

If I were to remake it, I'd find a way to make the scoops more scoop-like.

But it's good for a first amigurumi design, right?! :) 
The Ice Cream Cutie crossed the Ravellenics finish line yesterday afternoon. 


Hope everyone has a great weekend! 
Find more Finished Objects on Tami's blog! 

Friday, August 3, 2012

A Finished Snail

Happy Friday!

This week flew by! I started a lot of items, but only finished one. Luckily, it's the snail! 

Ready to see the pictures?? 
She's pretty adorable, if I do say so myself. 


TAH-DAHHH! 


As many of you guessed, it is indeed Stacey's pattern from FreshStitches!


You can get your own Milton the Slowpoke Snail pattern, as well as many other adorable animals, from her book Crocheted Softies


Check out more Finished Objects on Tami's Amis blog. She is the brilliant mind behind these fun blog posts. :) 

Wednesday, August 1, 2012

WIP Wednesday

Can you believe it's Wednesday?! Better question: Can you believe it's August??

Well, as it's Wednesday, lets show the WIPs going on in my little corner. 

 (Much better photos in this post!)


First, lets take a look at the snail-to-be! 


The tan-ish colour is absolutely pretty horrid. It has a pink undertone that makes my stomach turn. However, I'm hoping that by pairing it with a maroon shell, the tan will stand out more than the pink undertone! 


All that's left is the main body and stitching it all together. Hoping to have this to show for Friday's FO blog post!
 Remember my garden? I talked about it in this post. The picture to the right shows how the Marigolds have grown! The ones closest to the camera is the patch that's under the wanna-be screen in the original garden post. 


The picture below is of the growing Wildflowers. I lost quite a few accidentally when I mistook weeds for flowers. The weeds killed some flowers, but those patches are growing back after pulling the weeds! 


Saturday, July 28, 2012

Superwash Saturday

Craft School Saturday, yay!


    Happy Saturday! Every Saturday, I'm going to either try some new craft technique (sewing, knitting, crocheting, etc) and write about it here. Otherwise, I'll report something craft-worthy that I learned throughout the week. 


Yesterday was a rather yarn-filled day. After ordering some Team Spirit yarn from Red Heart, I felt the need to go to my not-so-local yarn store. I browsed the racks over and over and over. And in the very back of the store was this lovely rack of a variety of yarn that had my name written all over it. Well, it actually had a 40% off sign... but that's what was calling out to me!


I found these super vibrant skeins of a soft yarn. Turns out, it was just the brand I wanted to try! 


Cascade 220 Superwash Sport yarn! They were vibrant, colourful, and 40% off... how could I not get them?! 


Granted, at the time, I didn't know what superwash meant. Or what sport yarn is best used to make. But look at the pretty colours! Coral and ivory. (The ivory is actually called "banana cream")


And this is where Craft School Saturday comes in! 
This week, I learned what superwash yarn is.
"Superwash wool is a special wool product that has been treated or processed in a way that allows it to be machine washable." (about.com) 
There you have it! It just means that it's machine washable!

What about "sport" yarn? Sport yarn is just the weight of the yarn, like how there's worsted, bulky, etc. It's a lighter yarn, similar in size to baby yarn, as far as I can tell. 

So, the big question when it comes to yarn: What are you going to make with it??
I had no idea what I would make with the skeins. There's not enough to make a scarf in a stripe pattern (only 136 yards of each skein) like I wanted, so I thought about other options.


Hat? No. Bag? Definitely no. 


So then it hit me: amigurumi! A teeny tiny little animal. 


Poor lighting = poor picture


It takes a 'D' hook (3.25 mm) in order to not gap between every stitch. It's tedious, but the end result is going to be rather charming. 


Can you guess what animal it will be?


Happy Crocheting! 

Friday, July 27, 2012

First Finished Object Friday

Happy Friday!


I haven't written in a while-- and I've decided that I need to write more frequently. So to take a page from other blogs, I'll start dedicating certain days to certain posts. 


One of which being Finished Object Friday! 


To start it off, I did a one-day project as a pattern tester. Used up some yarn stash and came up with a hat that doesn't fit, accidentally made backwards, and totally adorable! 


Hoot, hoot! 
The Hooty Owl hat on Ravelry. It's available in sizes Newborn to Adult, and an incredibly fun project. 


And everything else is a Work In Progress. :)


Happy Friday!


Friday, June 22, 2012

Garden Week

"If you have a garden and a library, you have everything you need" -Marcus Tullius Cicero


This post is a little late in coming, but it is has been a rather hectic week. Last Friday, I had a notionthat I must have a garden. It took an hour to plan what I was going to grow (flowers; quick germination, early to bloom, perennials so they keep growing year round). I went to Home Depot to get seeds, thinking they'd have a wide variety of perennial flowers to choose from. Not so much there. I ended up getting a wildflower mix with annuals and perennials in it. The amount of seeds was estimated for a 25 sq ft. location-- my little patch is 10 sq ft at most. 
 It's a cute little patch, and I'm excited for the flowers to grow. :) In addition to the wildflower patch, I also transplanted some Marigolds from my Mema's garden. 


Some things I learned about transplanting flowers: love water, hate direct overhead sun. 


They were wilting almost to a brown colour almost every afternoon while the sun was on them. 


Quick fix solution? Make a tent! 
Something had to be done, so I made do with what I had on hand. Thus, this particular tent is made of old window screen, bamboo sticks, knitting needles, and rubber bands. 


Alas, it did not work. The Marigolds were still as wilted as ever come the Afternoon Sun. 

At that point, I was told that they needed more water. (Doh!) 


--They seem to be much better since then. (Can you see them through the curtain?) 


Now, a week later, the wildflower patch is full of little teeny tiny little seedlings and the Marigolds are growing and not wilting! 
-------------------------------------------------------------------
Irony: When your air conditioning unit falls apart on the first "official" day of summer. 


Being in Arizona and not having any air conditioning while the temperature outside is a whopping 108F+ is not exactly the most pleasant situation. Frozen compresses, ice water, and limited sleep reigned. As of right now, a window air unit has been installed, cooling down half the house. On the hunt for "portable" a.c. units now, for the bedrooms.
--------------------------------------------------------------------
In my little Crochet World, there are manymanymany things going on. Firstly, I was lovingly given an addi Swing Crochet Hook. Size J. This makes my total addi Swing count: 2!


I wanted to do a Serious Crochet Project with an addi Swing, so I could really get to use it and decide if I want the full set as much as I think I do. 


I hold my crochet hooks "knife style", and this hook is amazing! It makes it so easy to crochet for an extended amount of time. 


The pattern I've dedicated as the "Serious Crochet Project" is Red Heart's free pattern Corner-to-Corner Throw. It's a really fun pattern, and I'm excited to see the finished project! 


As for the blanket mentioned in the very first post, it is still a WIP. The border is all that's left. Working on a full blanket while sitting in a non-air conditioned room is just not going to happen, though. So it's been put aside for the time being. 


Now, it's time to get back to moving the sprinkler around the lawn in an attempt to keep the grass from dying. :) 


Happy Garden Week! (I self-proclaimed it Garden Week-- I have no idea when "Garden Week" usually is, but I'm sure there is one) 

Tuesday, June 5, 2012

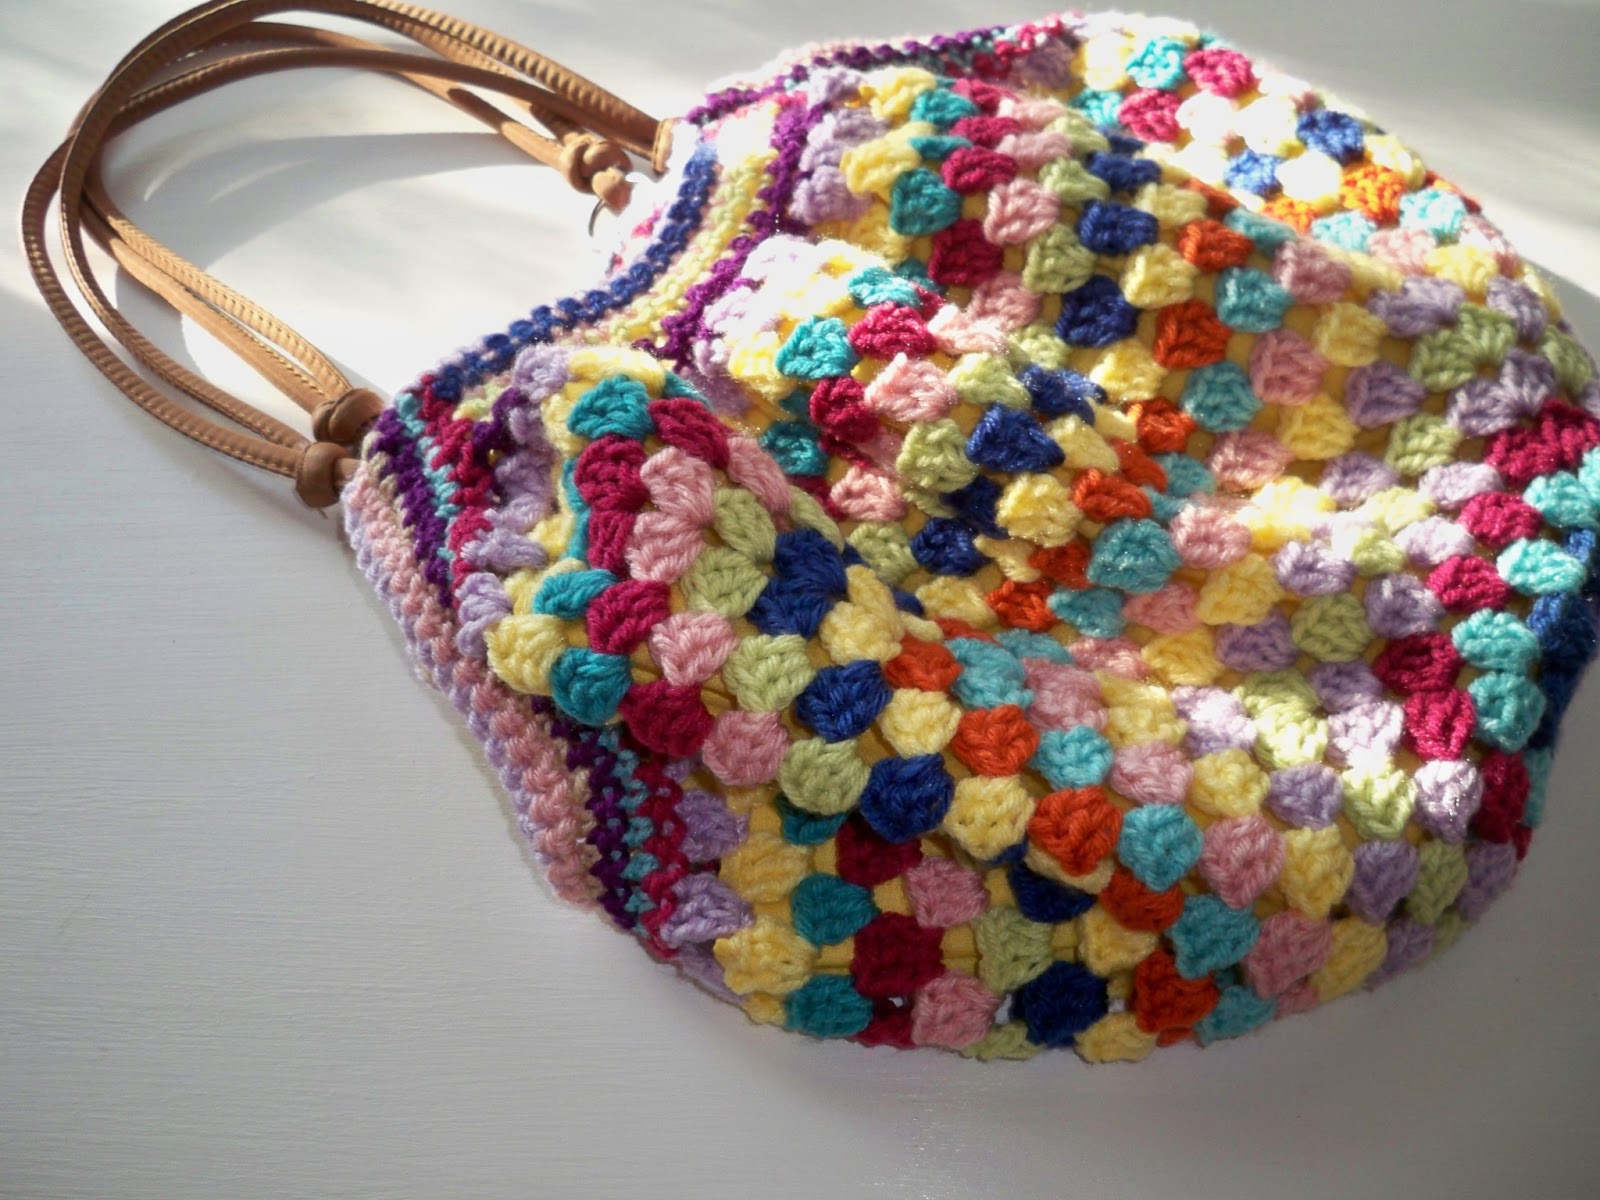
Granny Bag Tutorial


I made this pattern a few weeks ago, and found I had some troubles figuring out the mouth/sides, so I set off on a mission to make a picture tutorial on how I did it. :)

Firstly:
  -The pattern can be found here. It's Pierrot Yarns 29-210-44 Striped Bag.
  -I honestly have no idea if how I did it is how the pattern calls for. However, it worked for me, and I'm hoping it'll work for you! 
 -Any crochet terms are written in US-terms. 
And on these notes, here we go!

Start off with a granny square. I did 20 rounds to get my desired bag length.


To make things easy, line the bag before working on the mouth/sides. The bag was too big to use a fabric square, so I completely destroyed creatively used a yellow pillowcase that's been sitting in the hall closet for quite a long time. 


Now, lets get started on the mouth part! sc once in each ch-1 space on one side of the granny square. The stitches are very loose, they become puffy, but it works, trust me! 


When you get to the end of that side: ch-1, turn, sc in each sc across. Keep doing rows until it's long enough to wrap around your handles. I did 6 rows. 
Next, make the mouth side on the opposite end of the granny square. So, you end up with this:


 Onto the sides! To start, crochet down the rows we just made. Once you get to the granny square part, sc in each middle dc of shell and ch-1 space. 


 Over, and over, and over again until it's long enough. I sc2tog during the tan round, to help pull the sides up, but that's completely optional. Repeat on the opposite side. 


 Then, for added cohesive-ness (yup, just made that a word!) I single crocheted all the way around.


Attach your handles, and there you go! A granny square bag! 


Happy Crocheting! :) 

(Edited: 1/26/2013) This used to be atadplaid.blogspot.com and I just changed the blog name. Tutorial is still my original one. :)