I haven't written a blog post in a while. Specifically, I haven't written a finished objects Friday post. So here we go!
This has been a week of graduations. Elementary schools are finishing up their end-of-the-year parties, high school seniors are graduating, and college kids like me have been done for a while. All of my cousins are relatively close in age, which means I have a high school graduation to attend on both sides.
Originally, I wasn't going to make them anything-- we're not particularly close... But I decided they needed something special!
First to graduate was Cousin 1. He's leaving on his mission in the next few months, and I wanted to make something special for him that kind of signified that. (Plus, I had to finish a pattern test... two birds, one stone!)
The pattern is an upcoming design from Monster's Toybox. I'm not sure of an official release yet, but definitely keep an eye out!
The second cousin is an incredibly talented singer and I wanted to give him something that signified his gift. Thus, I gave him the Gift of Music (get the pun? do 'ya??)
There were no non-applique patterns on Ravelry so I made the design up as I went. I'm considering typing up the pattern and listing it for free to anyone who wants to make it. The same pattern could also make the Pi symbol... or, individually, they resemble golf clubs. Diverse pattern!
That's what I've been up to this week!
For more finished objects, check out Tami's blog:
Showing posts with label Crochet. Show all posts
Thursday, May 23, 2013
Wednesday, April 17, 2013
Legos, Legos everywhere!
It's Work-in-Progress Wednesday, and you want to know what I'm working on?
Team projects.
I'm working on team projects.
See that picture? Those are Legos. I spent three hours last night looking for one specific piece I needed to complete the piles for the team project.
The phrase should really be changed from "finding a needle in a haystack" to "finding that one specific Lego in an 18-gallon tub"!
And this picture was taken AFTER I had done a lot of sorting, so that isn't even all the Legos.
Still haven't found that piece yet. That's what makes it a WIP, right?
I also have a few crochet projects going on. Last night at Joann's, I found a skein of one of Red Heart's newest Super Saver colourways: Blacklight. I had to pick it up, and it's going to become a giant monster!
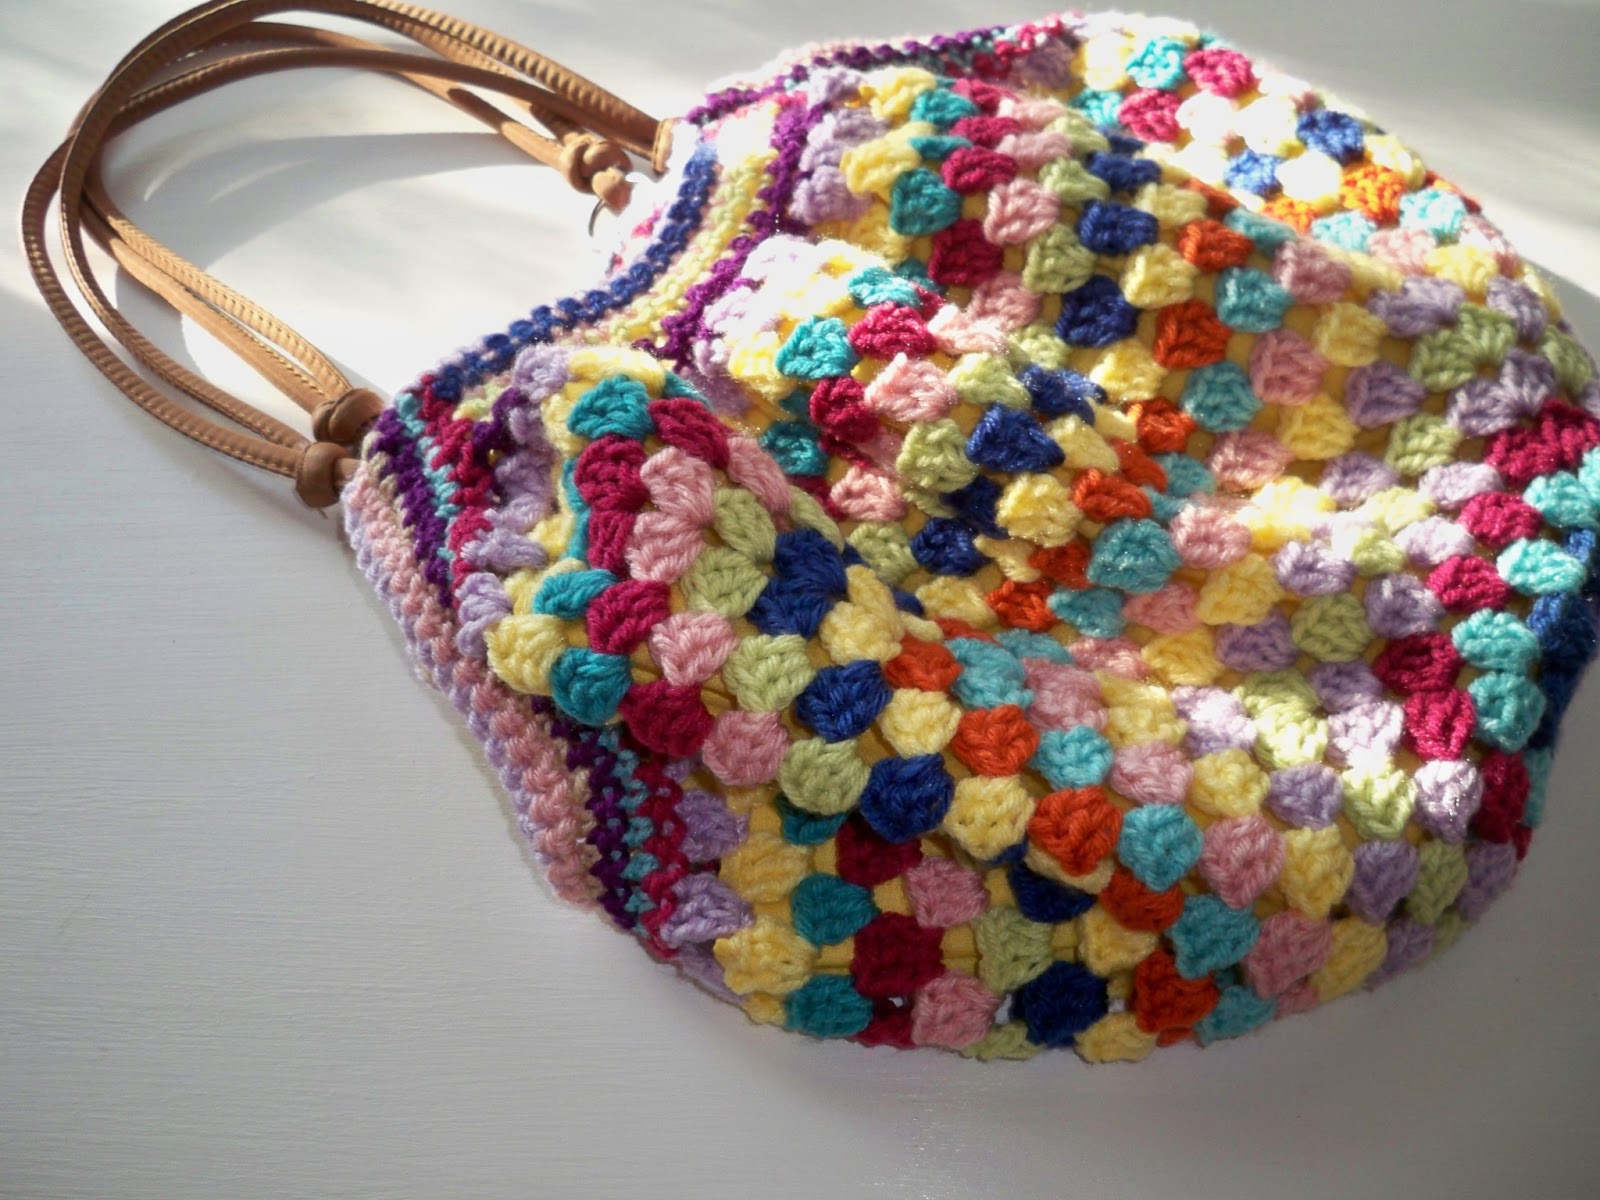
However, there's also a new bag I'm working on. It needs to be lined with fabric and have handles attached.
It should be a cute summer bag, though, once completed!
What are you working on this week?
Check out Tami's blog for more WIP Wednesday posts!
Team projects.
I'm working on team projects.
See that picture? Those are Legos. I spent three hours last night looking for one specific piece I needed to complete the piles for the team project.
The phrase should really be changed from "finding a needle in a haystack" to "finding that one specific Lego in an 18-gallon tub"!
And this picture was taken AFTER I had done a lot of sorting, so that isn't even all the Legos.
Still haven't found that piece yet. That's what makes it a WIP, right?
I also have a few crochet projects going on. Last night at Joann's, I found a skein of one of Red Heart's newest Super Saver colourways: Blacklight. I had to pick it up, and it's going to become a giant monster!
However, there's also a new bag I'm working on. It needs to be lined with fabric and have handles attached.
What are you working on this week?
Check out Tami's blog for more WIP Wednesday posts!
Monday, October 22, 2012
Security Blankets
As a crafter, we always seem to go through "phases"-- a bag phase, blanket phase, amigurumi phase, etc. etc. Want to know what mine is right now?
Security blankets.
Take a peek:
(All patterns are from BowTykes-- find her on Ravelry or Etsy!)
Security blankets.
Take a peek:
(All patterns are from BowTykes-- find her on Ravelry or Etsy!)
Well, I've been in a slump the last few days-- currently on day six of being sick; no mind set to study or get school-things done for midterms, and just the overall glum that comes from being in a city that refuses to acknowledge the changing of seasons.
It makes me wish that an adult-sized security blanket would be acceptable.
Think about it! A giant granny square with a giant owl in the center/on the top.
Crazy idea? Or a clever one? Hmm...
Saturday, October 13, 2012
State Fair Results
Last month sometime I dropped off five projects at the state fair as part of the Entry Competition. Judging was to be completed by the time the fair opens.
So I dropped off my items.
And I waited for the fair to open. I was supposed to go with family, but in a spur of the moment decision, I ended up going on Opening Day and saved $9 on admission.
Singh was squished into the case. If I were to look at it eye-level, all I could see was the body. The picture was taken with me practically kneeling in order to get his face into the picture.
So I dropped off my items.
| 4/5 entries on drop-off day! |
And I waited for the fair to open. I was supposed to go with family, but in a spur of the moment decision, I ended up going on Opening Day and saved $9 on admission.
So I went! And after much searching, I found all my entries. Here is the quick round-up:
- Singh the Lion (Crochet: Toy, Open Age) = 3rd place
- Milton the Snail (Stuffed Animal: Less than 15") = 3rd place
- Cocoa the Monkey (Stuffed Animal: Greater than 15") = 3rd place
- Scrappy, the Scrap Animal (Crochet: Scrap) = 4th place
- Granny Square Bag (Crochet: Bag) = 4th place
All of my amigurumi entries look like they had been manhandled; they were disfigured and horribly displayed.
| Singh the Lion |
Scrappy looked fine!
Cocoa's ears and mouth made me really sad-- they didn't make him look properly displayed at all!
And poor Milton's shell looked like the unicorn next to him sat on it.
Basically, I wish I could have set up the display myself.
My biggest issue with the experience was that I have no idea what won 1st or 2nd in a majority of the categories. I'm fine with 3rd place-- really, I am! But I wanted to see the awesome work that won 1st and 2nd!
Couldn't find them.
None of the displays were organized by category. They were scattered around everywhere in the huge place. I read the tags for every toy, every stuffed animal, everything that would qualify as the categories... and found nothing!
I did find 1st place in the Scrap category, though! It was a beautifully done blanket.
Will I make items for next year? Yeah, most likely. Will I make stuffed animals? Nope, probably not.
Have you entered any items into a fair? What was your experience like? I want to hear!
Thursday, September 27, 2012
Completing a Granny Square Project
Yesterday I posted about how to make a solid coloured granny square. That post was inspired by the FreshStitches' Ravelry group Cowl Swap that I am hosting.
However, making a big granny square project requires more than just the squares... you've gotta attach them together and add a border, right?! Especially if you're making a cowl like we are!
There are infinite ways to attach granny squares together, but I'm going to show you the two ways wonderfully outlined by some of my favourite crochet blogs, Attic24 and BunnyMummy [Full credits for the pictures go to them!] Clicking on the pictures will link directly to their blogs! :)
Here we go!
Attaching squares together can be a bit complicated when you want to make all the squares first, and THEN attach them. Here are two great ways to do it, though!
One way is the ever-popular whipstitching them together. This tutorial takes you through how to stitch them together so no seam shows up on the front side. Awesome, right? :)
However, for people who don't want to use a needle, there is a great tutorial about how to slip-stitch granny squares together. Since the cowls we'll be one row of granny squares, you won't have to worry about overlapping the stitches-- it's work out pretty this way, too!
Now that your squares are attached (after you get the five back from me... don't send me attached squares, please!), you have to choose if you want a border or not!
Also from Attic24 and BunnyMummy are these two border methods that would be great for all the projects, regardless if you choose to keep yours as a scarf or connect it to be a cowl/infinity scarf!
BunnyMummy presents a Granny Square Border that produces a nice, straight edge... all with one little tip! You could do just the first row, or add multiple rows, like she does for this blanket:
Attic24, however, shows us a way to create a beautiful border for a granny square that is a bit more lace-y.
And there you have it! Two ways to attach squares, two possible borders, and both from two wonderful sources.
:)
Labels:
Attaching Squares,
Crochet,
Granny Square,
How to,
Tutorial
Friday, September 21, 2012
Crochet Handles- Granny Bag
Hey look! Do you see what I see?
It's yet another Granny Square Bag!
This one is smaller (only 15 rounds) and has a more central colour palette, but it's pretty great, don't ya think?
This one is being entered into a Fair Entry Competition, under the category "Crochet: Bag". So I didn't exactly feel like attaching handles, and instead crocheted them!
However, one thing I've learned from crocheting-bag-handle experience, is that making handles, then whipstitching them on does not work.
Here is a brief tutorial, in case you want to crochet handles too!
First, I followed the same procedure as my other granny bag tutorial, all the way up to making the mouth of the bag, as seen below:
Next, I started the sides basically the same way, choosing a corner of a mouth, single crocheting down the rows we just made, and then single crocheting in each middle shell and ch-1 space.
However, when I got all the way up the rows of the mouth on the other side, I started chaining my handles. I chained 80, to get the height I wanted.
You can kind of see what I mean in the picture below:
You can see the blue rows that are the mouth of my bag. The green in one side, while the chains on the far left are the beginning of my handles.
Then, start crocheting immediately down the other side.
So you have something like this. You'll be working on both sides and the handles at the same time!
And then keep going around and around!
Because my bag was super small, I did a lot more sc2tog-ing.
On the second round of the sides only, not the handles, I did (sc2tog, sc in next 3).
On the third round: (sc2tog, sc in next 2).
And voila! Crocheted handles that won't come unraveled!
:)
Happy Crocheting!
Labels:
Bag,
Crochet,
Crochet handles,
Crochet tutorial,
Granny Square,
Tutorial
Tuesday, June 5, 2012
Granny Bag Tutorial
Firstly:
-The pattern can be found here. It's Pierrot Yarns 29-210-44 Striped Bag.
-I honestly have no idea if how I did it is how the pattern calls for. However, it worked for me, and I'm hoping it'll work for you!
-Any crochet terms are written in US-terms.
And on these notes, here we go!
To make things easy, line the bag before working on the mouth/sides. The bag was too big to use a fabric square, so I
When you get to the end of that side: ch-1, turn, sc in each sc across. Keep doing rows until it's long enough to wrap around your handles. I did 6 rows.
Next, make the mouth side on the opposite end of the granny square. So, you end up with this:
Then, for added cohesive-ness (yup, just made that a word!) I single crocheted all the way around.
Attach your handles, and there you go! A granny square bag!
Happy Crocheting! :)
(Edited: 1/26/2013) This used to be atadplaid.blogspot.com and I just changed the blog name. Tutorial is still my original one. :)
Subscribe to:
Posts (Atom)