Showing posts with label Granny Square. Show all posts

Thursday, September 27, 2012

Completing a Granny Square Project

Yesterday I posted about how to make a solid coloured granny square. That post was inspired by the FreshStitches' Ravelry group Cowl Swap that I am hosting.

However, making a big granny square project requires more than just the squares... you've gotta attach them together and add a border, right?! Especially if you're making a cowl like we are!

There are infinite ways to attach granny squares together, but I'm going to show you the two ways wonderfully outlined by some of my favourite crochet blogs, Attic24 and BunnyMummy [Full credits for the pictures go to them!] Clicking on the pictures will link directly to their blogs! :) 

Here we go!

Attaching squares together can be a bit complicated when you want to make all the squares first, and THEN attach them. Here are two great ways to do it, though!

One way is the ever-popular whipstitching them together. This tutorial takes you through how to stitch them together so no seam shows up on the front side. Awesome, right? :) 


However, for people who don't want to use a needle, there is a great tutorial about how to slip-stitch granny squares together. Since the cowls we'll be one row of granny squares, you won't have to worry about overlapping the stitches-- it's work out pretty this way, too! 

IMG_2463


Now that your squares are attached (after you get the five back from me... don't send me attached squares, please!), you have to choose if you want a border or not! 

Also from Attic24 and BunnyMummy are these two border methods that would be great for all the projects, regardless if you choose to keep yours as a scarf or connect it to be a cowl/infinity scarf!

BunnyMummy presents a Granny Square Border that produces a nice, straight edge... all with one little tip! You could do just the first row, or add multiple rows, like she does for this blanket:


Attic24, however, shows us a way to create a beautiful border for a granny square that is a bit more lace-y. 

IMG_4724

And there you have it! Two ways to attach squares, two possible borders, and both from two wonderful sources.

:) 


Friday, September 21, 2012

Crochet Handles- Granny Bag


Hey look! Do you see what I see? 
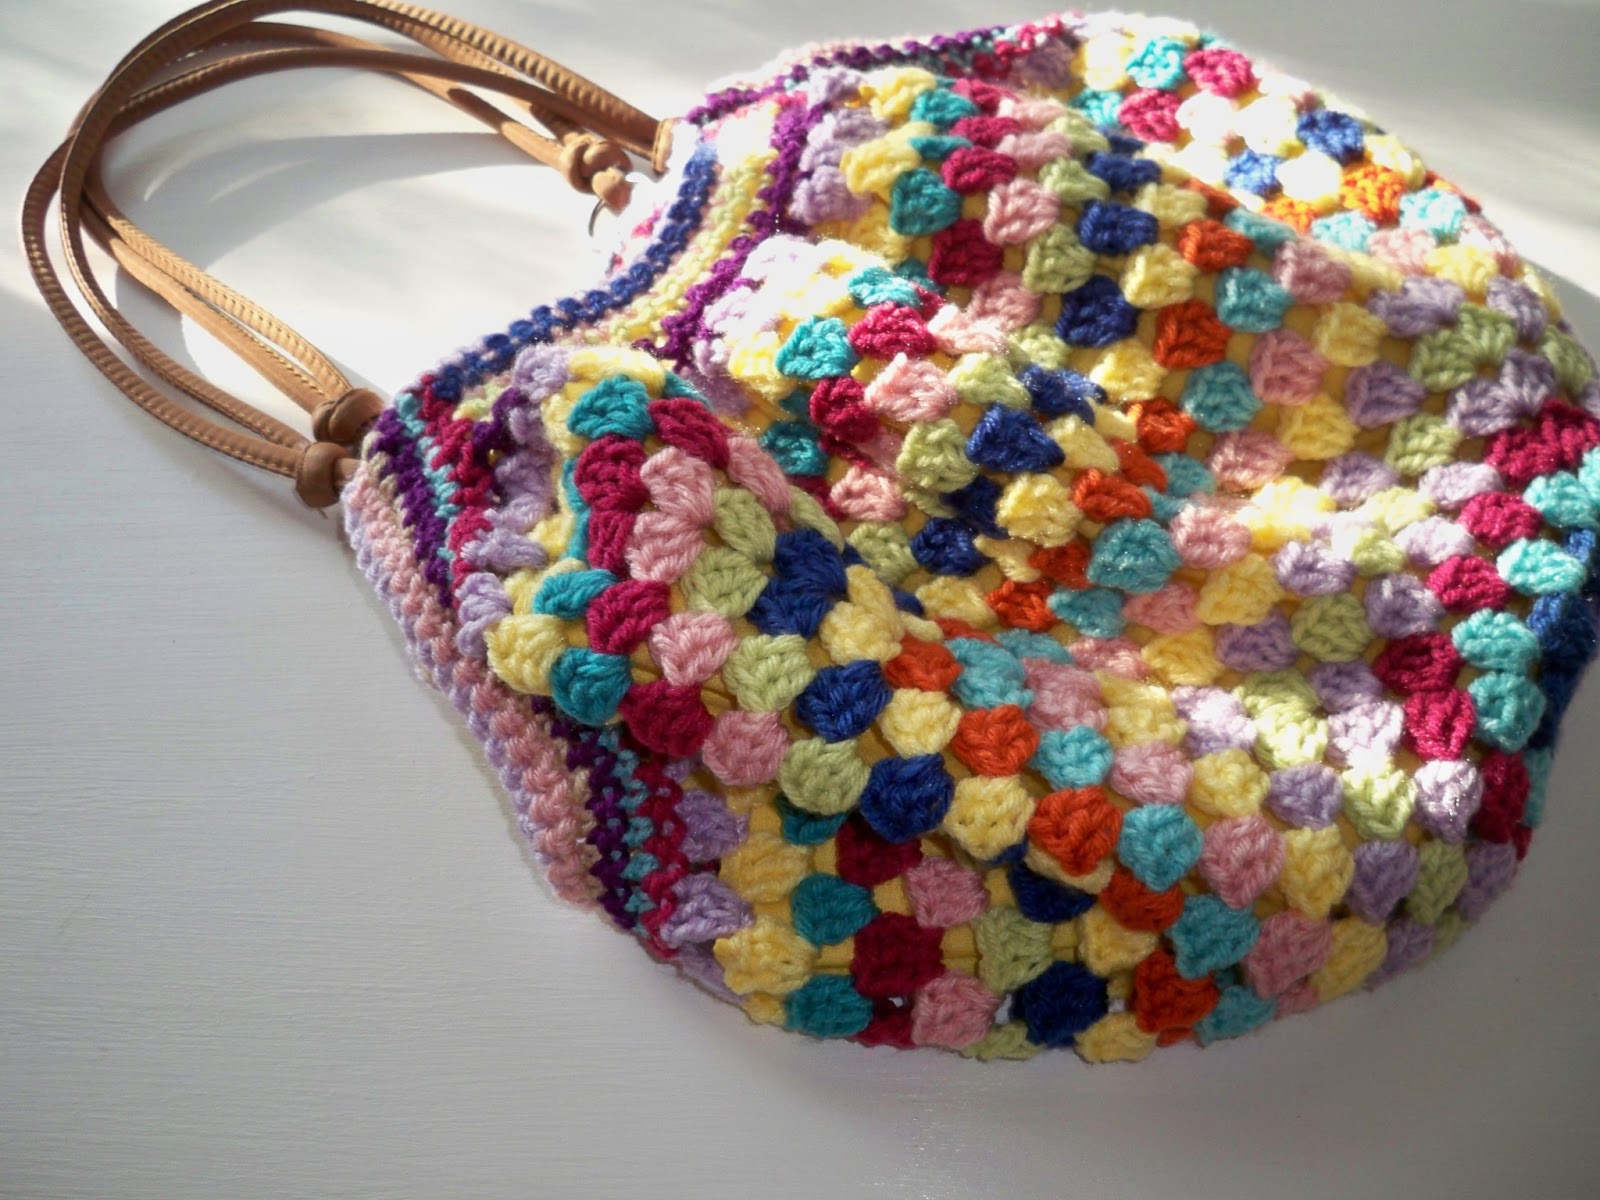
It's yet another Granny Square Bag!

This one is smaller (only 15 rounds) and has a more central colour palette, but it's pretty great, don't ya think?


This one is being entered into a Fair Entry Competition, under the category "Crochet: Bag". So I didn't exactly feel like attaching handles, and instead crocheted them! 

However, one thing I've learned from crocheting-bag-handle experience, is that making handles, then whipstitching them on does not work. 

Here is a brief tutorial, in case you want to crochet handles too!

First, I followed the same procedure as my other granny bag tutorial, all the way up to making the mouth of the bag, as seen below:


Next, I started the sides basically the same way, choosing a corner of a mouth, single crocheting down the rows we just made, and then single crocheting in each middle shell and ch-1 space. 
However, when I got all the way up the rows of the mouth on the other side, I started chaining my handles. I chained 80, to get the height I wanted. 

You can kind of see what I mean in the picture below:


You can see the blue rows that are the mouth of my bag. The green in one side, while the chains on the far left are the beginning of my handles. 

Then, start crocheting immediately down the other side.


 So you have something like this. You'll be working on both sides and the handles at the same time!

And then keep going around and around!
Because my bag was super small, I did a lot more sc2tog-ing. 
 On the second round of the sides only, not the handles, I did (sc2tog, sc in next 3).
On the third round: (sc2tog, sc in next 2). 


And voila! Crocheted handles that won't come unraveled!

:)

Happy Crocheting!


Tuesday, June 5, 2012

Granny Bag Tutorial


I made this pattern a few weeks ago, and found I had some troubles figuring out the mouth/sides, so I set off on a mission to make a picture tutorial on how I did it. :)

Firstly:
  -The pattern can be found here. It's Pierrot Yarns 29-210-44 Striped Bag.
  -I honestly have no idea if how I did it is how the pattern calls for. However, it worked for me, and I'm hoping it'll work for you! 
 -Any crochet terms are written in US-terms. 
And on these notes, here we go!

Start off with a granny square. I did 20 rounds to get my desired bag length.


To make things easy, line the bag before working on the mouth/sides. The bag was too big to use a fabric square, so I completely destroyed creatively used a yellow pillowcase that's been sitting in the hall closet for quite a long time. 


Now, lets get started on the mouth part! sc once in each ch-1 space on one side of the granny square. The stitches are very loose, they become puffy, but it works, trust me! 


When you get to the end of that side: ch-1, turn, sc in each sc across. Keep doing rows until it's long enough to wrap around your handles. I did 6 rows. 
Next, make the mouth side on the opposite end of the granny square. So, you end up with this:


 Onto the sides! To start, crochet down the rows we just made. Once you get to the granny square part, sc in each middle dc of shell and ch-1 space. 


 Over, and over, and over again until it's long enough. I sc2tog during the tan round, to help pull the sides up, but that's completely optional. Repeat on the opposite side. 


 Then, for added cohesive-ness (yup, just made that a word!) I single crocheted all the way around.


Attach your handles, and there you go! A granny square bag! 


Happy Crocheting! :) 

(Edited: 1/26/2013) This used to be atadplaid.blogspot.com and I just changed the blog name. Tutorial is still my original one. :)